Code C# Send Mail Auto
Giả sử yêu cầu của hệ thống quản lý nhân sự (HRM system) là cần chức năng tự động gửi mail thông báo ngày sinh nhật cho nhân viên trong công ty.
Làm thế nào để tạo lịch tự động gửi mail hàng ngày bằng C# (Send Mail Automatically for each day use C# language).Có nhiều cách gửi mail tự động như tạo file .bat sau đó đặt lịch(Schedule Setting) trong hệ điều hành Winodows để gửi mail, hoặc tạo chương trình Windows Service để tự động gửi mail, hoặc bạn cũng có thể cấu hình Database Mail và Job trong SQL Server để gửi mail tự động.
Trong bài này chúng tôi sẽ hướng dẫn các bạn cách gửi mail tự động hàng ngày bằng Windows Services.
1.Windows Service là gì?
2.Tạo Windows Service tự động gửi mail bằng C#.
3.Triển khai và cài đặt Windows Service tự động gửi mail.
1.Windows Service là gì?
Windows Serive là ứng dụng nền chạy ngầm trong hệ điều hành Windows.
Windows Service được sử dụng để xử lý các công việc tự động trong một khoảng thời gian dài từ lúc bật dịch vụ tới khi tắt nó đi.Nó có thể tự động chạy khi máy tính khởi động (Boot) hoặc tự động Start, Restart hay Pause mà không cần sự tác động của con người.
Windows Service là dịch vụ chạy ngầm do đó nó không cần có giao diện UI.
2.Tạo Windows Service tự động gửi mail bằng C#.
Các bước tạo ứng dụng Windows Service tự động gửi mail bằng C# như sau:
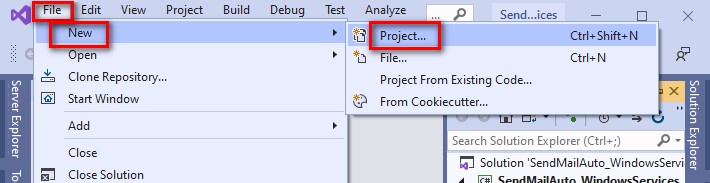
-Mở phần mềm Visual Studio sau đó chọn File/New/Project… để tạo mới.
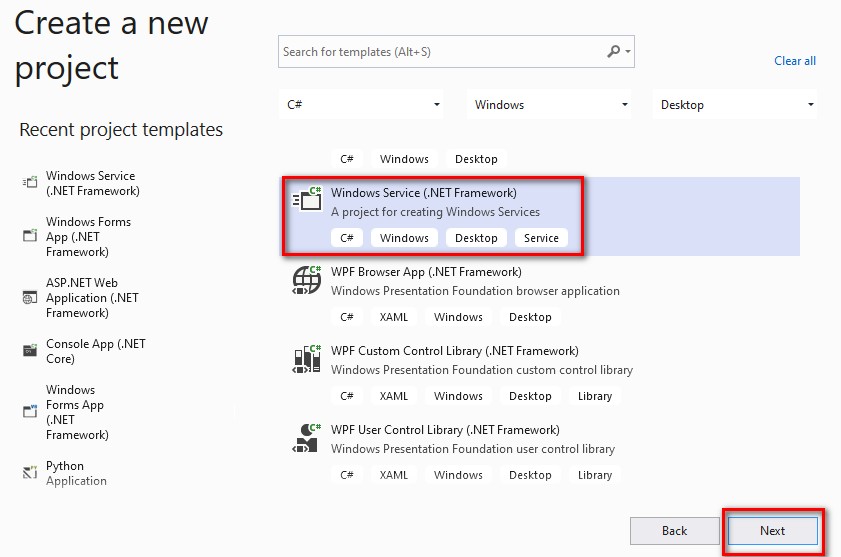
-Chọn Windows Service (.NET Framework) và nhấn Next.
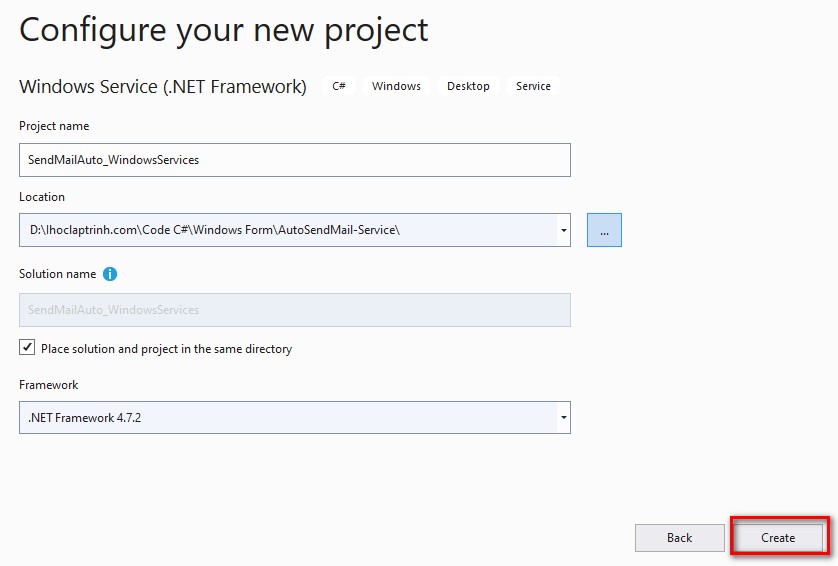
-Nhập các thông tin như tên dự án(Project name), nơi lưu trữ dự án(Location) và nhấn nút Create.
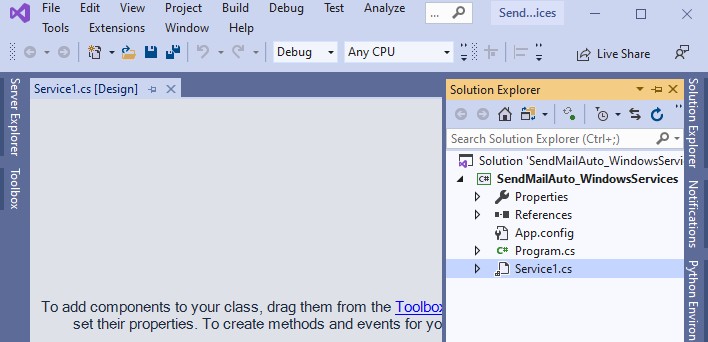
-Chương trình dự án được tạo ra như hình bên dưới.
-Mở file Service1.cs và viết code C# gửi mail như sau:
Ví dụ Code C# gửi mail tự động
using System;
using System.Collections.Generic;
using System.ComponentModel;
using System.Data;
using System.Diagnostics;
using System.Linq;
using System.ServiceProcess;
using System.Text;
using System.Threading.Tasks;
using System.IO;
using System.Net;
using System.Net.Mail;
using System.Timers;
namespace SendMailAuto_WindowsServices
{
public partial class Service1 : ServiceBase
{
//Khai báo Timer
System.Timers.Timer pv_Timer;
public Service1()
{
InitializeComponent();
}
protected override void OnStart(string[] args)
{
//Ghi log lịch sử thời gian dịch vụ bắt đầu chạy
WriteLog("Service is started at " + DateTime.Now);
//Khởi tạo Timer
pv_Timer = new System.Timers.Timer();
pv_Timer.Enabled = true;
pv_Timer.AutoReset = true;
//Khoảng thời gian thực thi ví dụ 60s một lần
pv_Timer.Interval = 60000;
//Xử lý sự kiện khi Timer Tick sẽ gửi mail
pv_Timer.Elapsed += new System.Timers.ElapsedEventHandler(SendMail);
//Start Timer
pv_Timer.Start();
}
protected override void OnStop()
{
//Ghi log thời gian dừng dịch vụ
WriteLog("Service is stoped at " + DateTime.Now);
pv_Timer.Enabled = false;
}
public void SendMail(object sender, System.Timers.ElapsedEventArgs args)
{
try
{
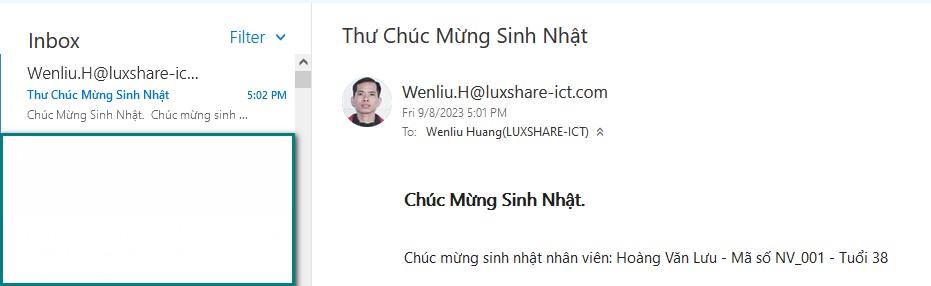
string Content_HTML = "<html> <body> <h3> Chúc Mừng Sinh Nhật. </h3> </br color:blue;> Chúc mừng sinh nhật nhân viên: Hoàng Văn Lưu - Mã số NV_001 - Tuổi 38 </body> </html> ";
MailMessage message = new MailMessage();
SmtpClient smtp = new SmtpClient();
message.From = new MailAddress("Wenliu.H@luxshare-ict.com");
message.To.Add(new MailAddress("Wenliu.H@luxshare-ict.com"));
message.Subject = "Thư Chúc Mừng Sinh Nhật";
message.IsBodyHtml = true; //Gửi nội dung dạng HTML
message.Body = Content_HTML;
smtp.Port = 25;
smtp.Host = "vnmail.luxshare-ict.com"; //thông tin Host Mail
smtp.EnableSsl = true;
smtp.UseDefaultCredentials = false;
smtp.Credentials = new NetworkCredential("Wenliu.H@luxshare-ict.com", "******");
smtp.DeliveryMethod = SmtpDeliveryMethod.Network;
smtp.Send(message);
//Ghi log thời gian gửi mail
WriteLog("You sent mail at " + DateTime.Now);
}
catch (Exception) { }
}
public static void WriteLog(Exception ex)
{
StreamWriter sw = null;
try
{
sw = new StreamWriter(AppDomain.CurrentDomain.BaseDirectory + "\\LogFile_ihoclaptrinh.txt", true);
sw.WriteLine(DateTime.Now.ToString() + ": " + ex.Source.ToString().Trim() + "; " + ex.Message.ToString().Trim());
sw.Flush();
sw.Close();
}
catch
{
}
}
public static void WriteLog(string Message)
{
StreamWriter sw = null;
try
{
sw = new StreamWriter(AppDomain.CurrentDomain.BaseDirectory + "\\LogFile_ihoclaptrinh.txt", true);
sw.WriteLine(DateTime.Now.ToString() + ": " + Message);
sw.Flush();
sw.Close();
}
catch
{
}
}
}
}
-Cấu hình cài đặt Windows Service
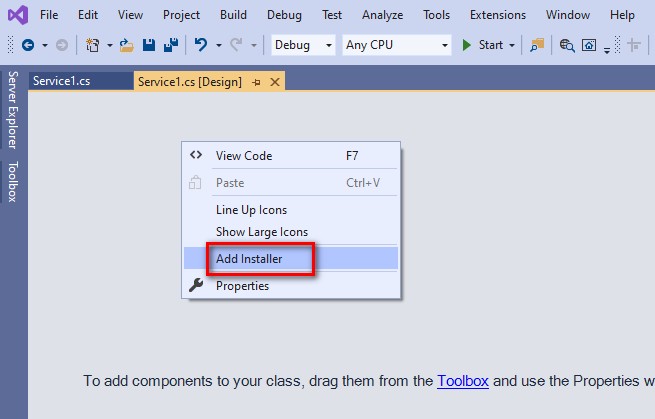
-Trên giao diện Service1.Design nhấn chuột phải và chọn Add Instaler.
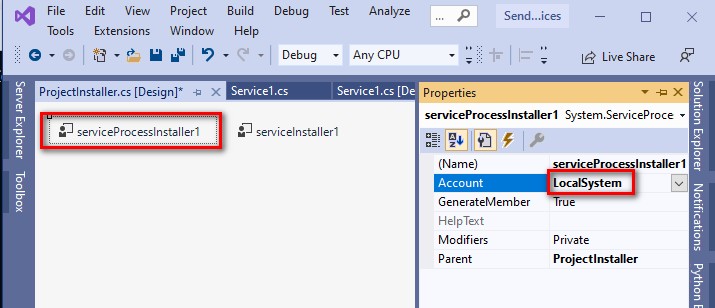
-Tùy chỉnh tham số cho serviceProcessInstaller : Chọn Account là LocalSystem
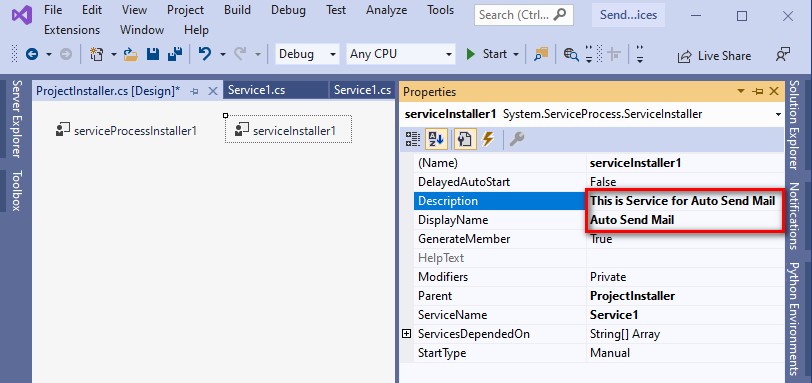
-Tùy chỉnh tham số cho serviceInstaller : Thiết lập tên hiển thị (DisplayName) và mô tả (Description).
3.Triển khai và cài đặt chương trình Windows Service.
Sau viết code C# chương trình tự động gửi mail Windows Service xong, bạn cần triển khai và cài đặt chương trình.
Các bước triển khai và cài đặt chương trình gửi mail tự động Windows Service như sau:
-Build chương trình ở chế độ phát hành Release.
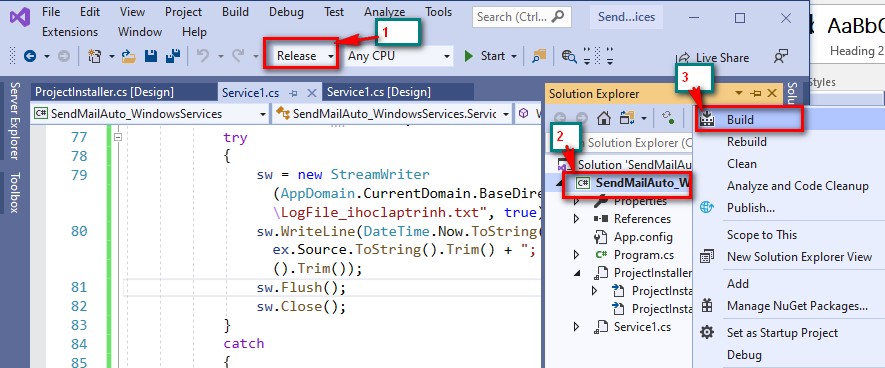
-Chương trình được Build trong thư mục Bin/Release như sau
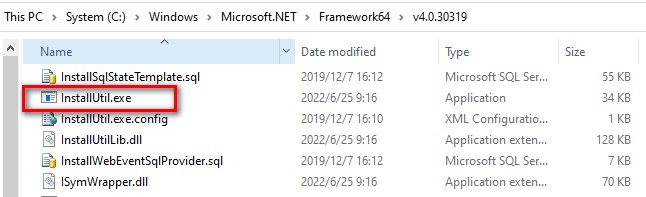
-Bước tiếp theo là cài đặt Windows Service.
Để cài đặt Windows Service bạn sử dụng InstallUtil.exe của Visual Studio để cài đặt chương trình Windows Service
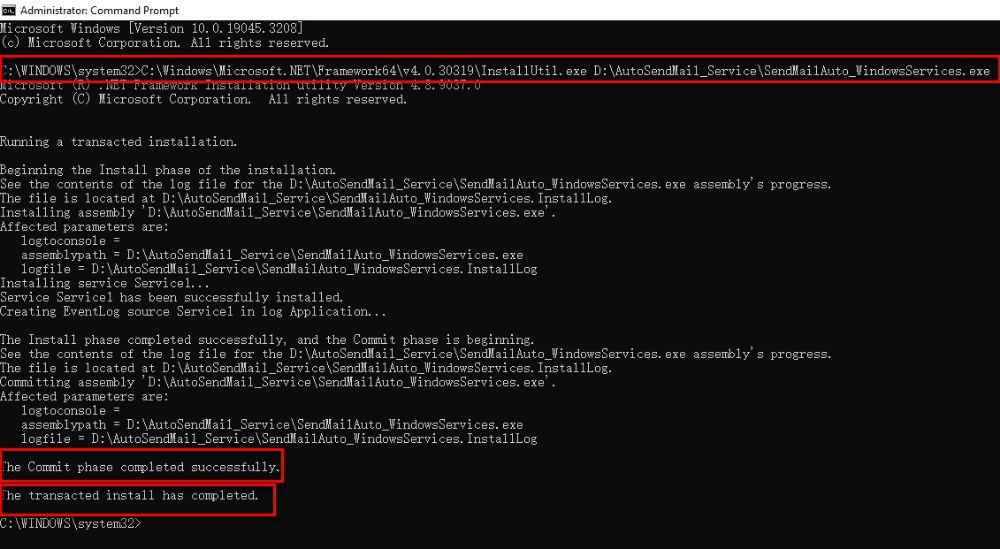
Lênh cài đặt trong cmd như sau:
C:\Windows\Microsoft.NET\Framework64\v4.0.30319\InstallUtil.exe D:\AutoSendMail_Service\SendMailAuto_WindowsServices.exe

-Nhấn Enter để chạy lệnh cài đặt Windows Service.
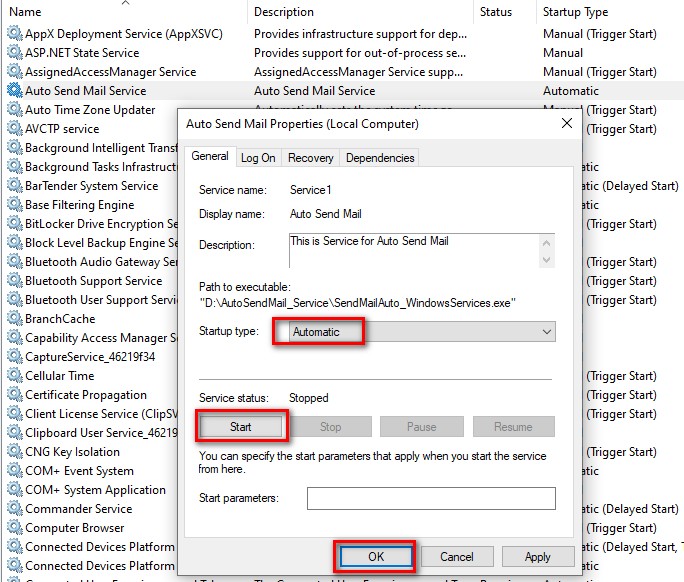
-Xem và kiểm tra Service: Vào run và gõ lệnh : services.msc
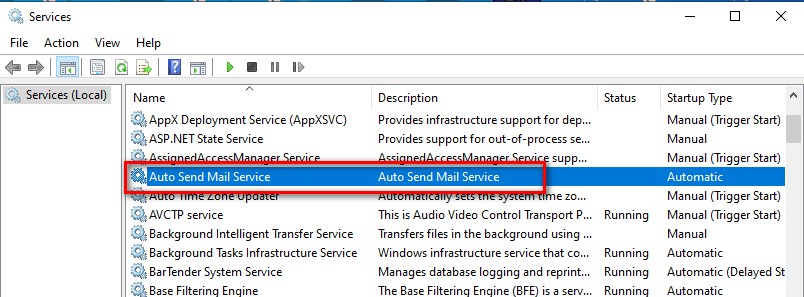
-Start dịch vụ Service
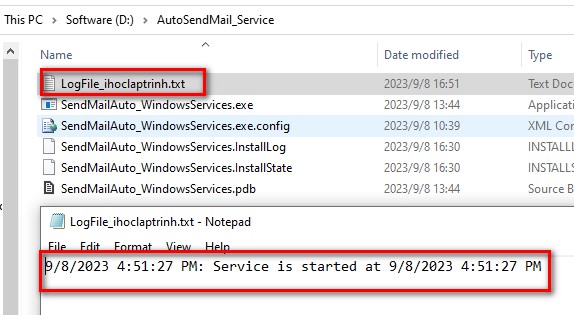
-Kiểm tra LogFile_ihoclaptrinh.txt.
-Kiểm tra Mail: Mở mail và kiểm tra xem, nếu bạn có thể nhận email như hình dưới đây là bạn đã xây dựng chương trình tự động gửi mail thành công.